Computer-controlled cutting
Objectives of the week
- Characterize your lasercutter, making test part(s) that vary cutting settings and dimensions
1. Group assignment
Assignment 03 Computer Controlled-Cutting
.
Group assignments on Laser cutter:
Process 1.Understand Laser cutter
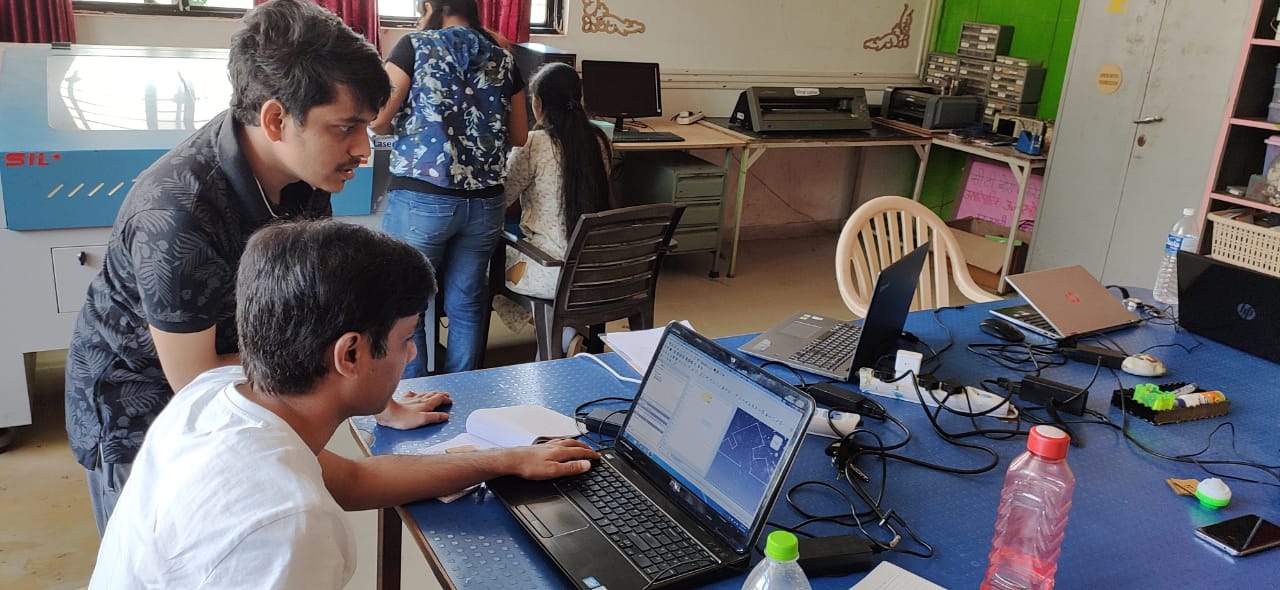
On Thusday morning Our Lab instructor Mr Suhas brief us and and give us detailed information on Laser cutter.In that session he told us about the specification of machine, manufacturer and most important thing about is saftley measures while handlind machine.So lets see our LASER CUTTER"
About Laser cutter:
SIL Laser Engraving - Cutting Machine is versatile & finds application in signage, indoor & outdoor advertisement, art & craft, gift, shoes, toys, garments, model cutting, papers & packaging, wood & MDF cutting industry, interior, decorators and many more.
Specification:
Following are the specification of SIL Laser cutter.
| Model NO. | 1325-1318 |
| Engraving speed | 0-640000mm/min |
| Cutting speed. | 0-30000mm/min |
| Laser type | Co2 DC glass laser tube |
| Laser power | 80Watt |
| Positioning Accuracy | 80Watt |
| Processing area | 900 by 600mm |
| Working speed | Adjustable |
| Power supply | AC 220V+ 5%; 50/60Hz |
| Format supported | AI, BMP, PLT, .DXF, DST etc. |
Features:
Procedure to start Laser cutter:
Check mains->Turn on isolation transformer->Turn on UPS->Turn on Air compresser->cooler->Turn on Laser cutter main->Turn on Laser->Turn ON Exhaust->Turn on Lamp->Interface with laptop->Download file from lptop to machine ->Finally,click on stsrt button of Laser machine.
Process 2.Deep dive into laser cutter speed & power
In afternoon session we planned to understand the effect of speed and power on cut width , kerf angle, engraving depth.
Friends,when we used laser cutter to cut the material most important aspects to consider is to balance the speed and power.
Usually,we expect the machine to cut the material as fast as ,but are they enough strong to do this?"may be not".
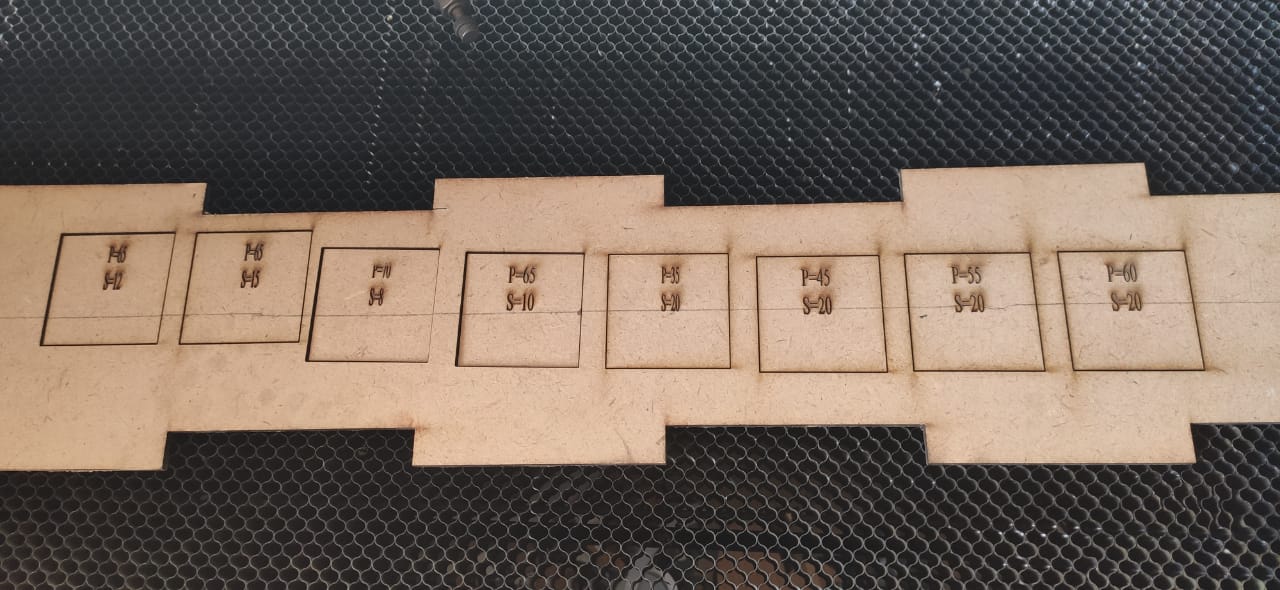
Our experiment was simple: using “FreeCAD” we drew a series of 5mm by 5mm squares and cut 10-20 examples of each using different Energy settings. Each individual square was measured with a micrometer for two different characteristics:
So What exactly we did?
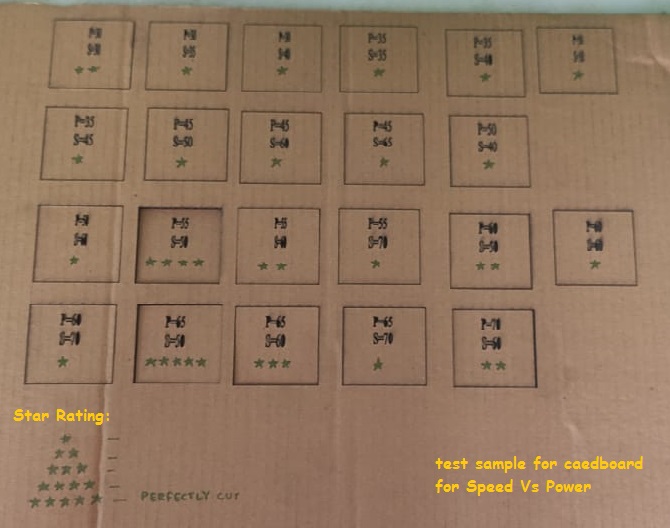
We design a 2D Square using FreeCAD around 22 pieces ,each one is tested with different speed and power for cardboard,MDF and acrylic shhet.Following table shown you comarision of laser cutter performance with repect to speed and power for diiffwrnt material surface.
| Material | Power | Speed | Star rating |
|---|---|---|---|
| Cradboard | 55 | 60 | ** |
| 70 | 60 | ** | |
| 45 | 60 | * | |
| 40 | 30 | ||
| 45 | 40 | * | |
| 65 | 60 | *** | |
| 65 | 50 | ***** | |
| 40 | 30 | ||
| 60 | 50 | ** |
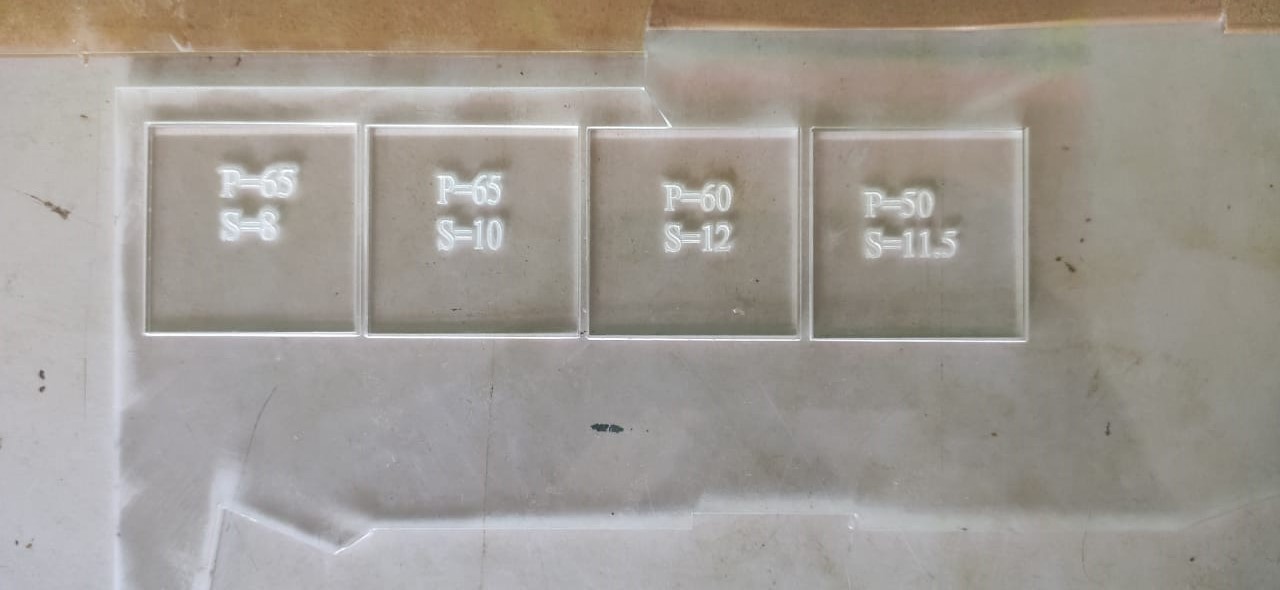
| Material | Power | Speed | Star rating |
|---|---|---|---|
| MDF | 70 | 08 | ** |
| 65 | 10 | ** | |
| 65 | 12 | ***** | |
| Acrylic | 50 | 11.5 | ** |
| 60 | 12 | **** | |
| 65 | 08 | *** |
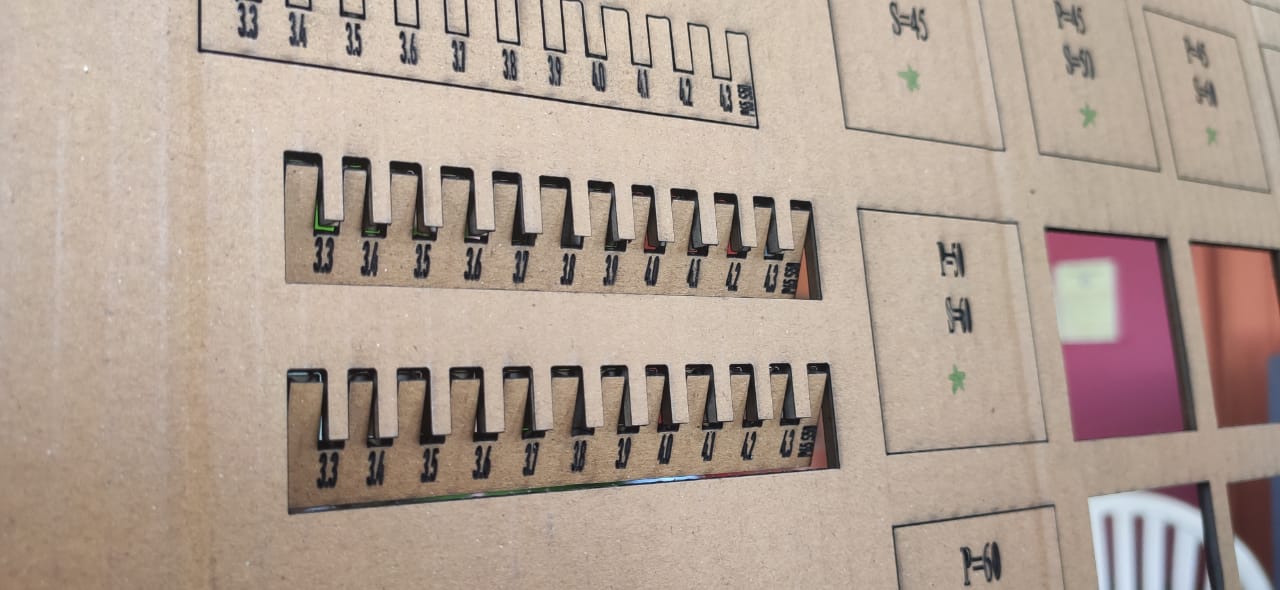
Process 3.Press fit ,Setting different width with two comb
In next day morning at 9:30 am,we all fab students gatherd in Fab lab discuss the last day work ,analysed it and based on that we decided to go for two comb structure .
a)Constraints of comb:
After assigning these constraints we export the file in autodesk DXF 2D formats which is to import in RD software(third party software).Using RD software we can download the file in Laser cutter machine.
Process 4.Calculate avg.Kerf for a square
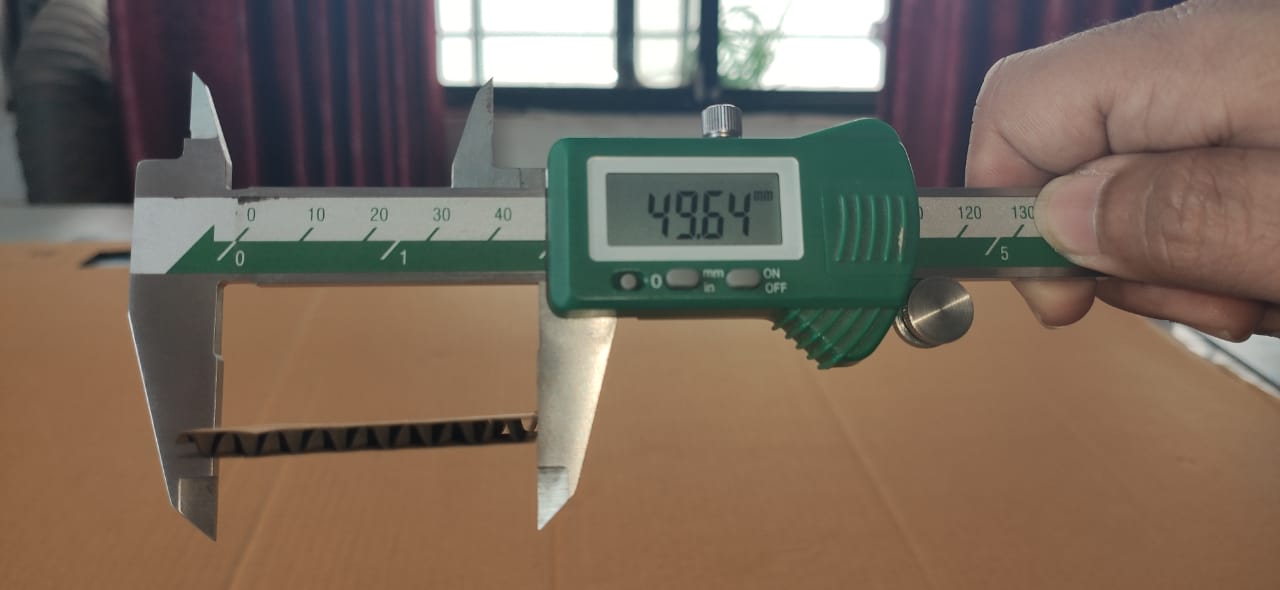
In next session of same day ,our instructor told us to design sketch and used surface material like cardboard ,MDF and acrylic to build your structure and while doing this he asked us to measure all our boards first ,cut them all and find how much material is actually removed by laser cutter? But we didnt understand why we are doing this exersize?Guess what we come know that actually laser cutter cut the material 0.4 mm short for cardboard,for 0.4mm for MDF and for 0.5mm for acrylic.This introduced a new term called kerf.So while discussing with my fellow fab mates we raised some qustions like Why it is necessary to calculate kerf? What is mean by kerf ? Why this term come into picture ? and so on.To answer all we asked Ms.Apeksha local instructor to tell us about these.
Q1.What is kerf/Kerf width?
Kerf width is the width of laser beam that cuts into the manufactured part. we used following formula to calculate kerf. kerf=(X-Dir kerf+Y-Dir kerf)/2
Q2.Why this term come into picture?
When laser cutter cut the material resulting in materail lost .Specially with laser cutter.So thing is how can we ensure you leave enough room for kerf.
Q3.Why it is necessary to know kerf?
Knowing kerf is very convient because it offers neither it alllows us to adjust our cut-off-sets based upon the level of tolernce that we actually expected.
Q4.What are factors keep in mind while calculating kerf?
Our local instructor Ms.Apeksha told us about the factors .She told us that material and laser focus these are the two important thing in calculation of kerf.Using Laser when we cut the cardboard ,it leavs behind small material.But for MDF and acrylic it leave behind large material.This will result into increase in value of kerf.Also performace of laser focus depends on the thickness of the material as well.What she told we experience while doind it as well.(Show the table reading of Cardboard,MDF and acrylic)
So ,finally we calculate the actual kerf cut by our laser which is too small.So calculated kerf for cardboard is 0.4mm